
Good Monday morning to you! Hope the sun is shining on you and that all is right in your world today! Boy oh boy, do I ever have a full week planned for you! I will be highlighting, showcasing and simply loving on the beautiful new stamp set called Abstract Impressions all week long!! When I looked through the new catalog (Have I mentioned that big guy is available and now live!!) I fell head over heels in love with this new set. It is amazing!! I have made oodles of projects already using this set and I will be sharing them with you here all week long! Let's jump right in, shall we?!!

Very first thing I made with this new set was a card! My card base is Pear Pizzazz and my layers are Petal Pink and Whisper White. I stampd 2 flowers directly onto the card using the three step stamping method. That basically means that each flower is made by stamping 3 stamps one on top of another in different shades of color. It is very cool because it adds a look of dimension to your image. After I stamped those I stamped a third flower on a separate sheet of card stock and fussy cut it out. I added it on top using a dimensional.

I tucked a few leaves underneath that I punched out using our Leaf punch and then added some Rose glimmer accent dots that I punched using a standard hole punch. I also added that fun border along the left hand edge using the Decorative Ribbon Border punch. The sentiment is stamped in Soft Suede and is also from the Abstract Impressions stamp set.
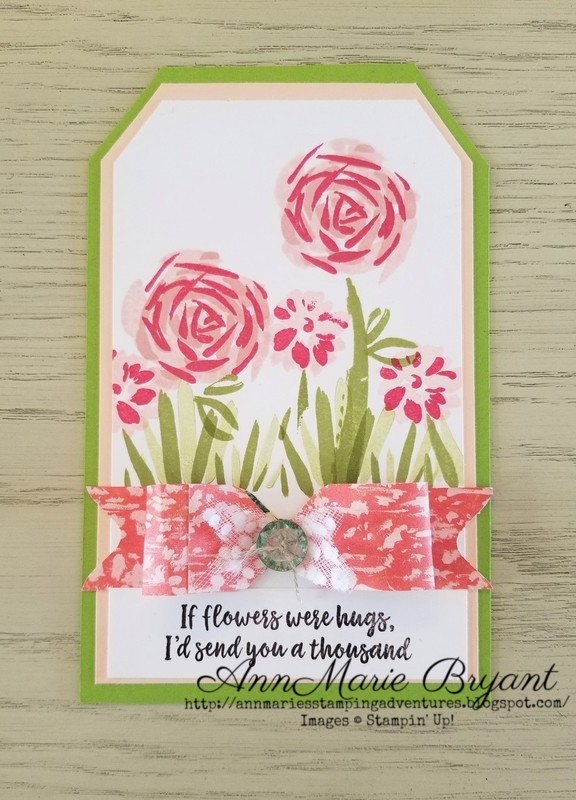
I made a matching tag to go with the card! It measures 4" x 6 1/2". I used the same colors to keep them cohesive looking. I stamped the grassy stems in Pear Pizzazz. I stamped once and then again (before re-inking!) to get that faded look. (Another fun way to add dimension to your projects!)

I added a giant paper bow that I made using the envelope punch board! (I love that thing!!) Have you used yours lately? Well, pull it out and dust it off, because I am about to teach you how to use it to make a bow! Really, go grab it! I will wait....
*sips coffee, checks email, loves on the the dog...*

Ok, let's get started! You are going to need a strip of DSP measuring 1" x 10".

To make your tails you will need to tuck the end into the hole punch like so. Try to center is the best you can.

It should look like this after you have punched. Now do the other end too!

Put your strip back in long ways so that the end is at the 2" mark and punch.

Move it down so that the end is at the 5" mark and punch.

Flip the whole strip upside down and repeat the same process; first at 2"...

...then again at 5". Now take the strip out turn it around to the other end and repeat at 2" on the other end and then flip over and do the same.

This is what it should look like once you've done the punching, flipping, turning and punching! Tail, right center segment, left center segment, tail.

Grab a bone folder and run it under the two center segments loosening them up some and giving them a little bit of a bend shape. Grab your glue dots and get ready to start assembling!

Fold your right hand center segment (between the tails) in half so that the edges line up and using a glue dot stick it together.

Now bend the end backwards and using another glue dot (or adhesive of your choice) adhere the bow part to the straight tail part. Repeat on the other side!

Yay! Congrats! You should have a bow shape like this now!

Time to embellish it up! You can add all sorts of fun things to dress it up!

Here they are together!
Here is a list of all of the goodies I used to create my projects today:
Product List


 Designer Series Paper")


 Polka Dot Tulle Ribbon")


Click on any picture to head straight to my store for ordering! I have a full day, so I am off! I enjoyed visiting with you though and look forward to seeing you tomorrow! I have lots more to share with you!

No comments:
Post a Comment