Independent Stampin Up! Demonstrator since 2007
Welcome to my little ole' stamping blog! I'm so glad that you stopped by! I have lots of creative things to share with you with the occasional life post thrown in! Come on in, relax and stay awhile! :)

Wednesday, July 30, 2014

Thinking of you!

Hi there! Can you believe that it is the middle of the week already?!  Sheesh, time really does fly!  I have a card to share with you today!  I was able to just sit down and play with no deadline or occasion in mind.  That always makes for nice, relaxed craft time...love it!   Here is what came together on my craft table:

I used the Hostess Bloom with Hope for my main image.  I stamped it onto Vellum with Momento Tuxedo Black ink and the colored it in from the backside using the fun, fun (did I mention fun?!!) new Blendabilities!  Once I turned it back over I added some white highlights with my handy, dandy trusted while gel pen.

I put a sheet of DSP from the pack Typeset behind the image to add some visual interest and then tied it all up with some Baker's Twine.  The dangling heart is to let the recipient know that not only am I thinking about them, but that I love them too! Awwww! :)

I used the Decorative Dots EF on the edge of the card and backed the main image with Rich Razzleberry.  The card base is Crumb Cake and there is a scalloped tag  peeking out from the top.  I challenge you today to let someone you care about know that you are thinking of them!

I hope that you have a good day!  Mine is a full one, so I am off to make busy!!  I will be back soonest with more to share!


Monday, July 28, 2014

Masking fun!

Hello, hello and happy Monday to you! Have you played with Stampin' Up!'s new masks yet?!  What a fun new toy they are!!  You have lots of options when using them too.  You can ink spritz, sponge, use markers and even stamp!!

This is what they look like:
(This is the polka dot and stripes pack, but you can also get them in adorable hearts and stars!)

  I am going to show you how I used them with the spritzing bottles.  You can buy two spritzers for just $2.95!  They are totally re-usable too!  

 All you have to do is fill the bottle 2/3's of the way up with the alcohol and add a couple of drops of re-inker. The more drops you use the darker your color will be. You can use water, but the alcohol will dry much faster.  Remember you are working with paper and it doesn't really love getting wet!

You want to lay your mask down over your paper and then spray away!  I used Cherry Cobbler here.  The more spraying you do the more you increase your chance of bleeding or the ink running under the mask.  I tried several pieces of paper and lots of different spray amounts and this is one that I sprayed a lot!  I used the the one that I only sprayed lightly for the next couple of pictures:

I cut apart my sprayed piece and used it for the background on this card.

I used the Kinda Eclectic stamp set for my center image.  Also used several punches/Framelits:

Pansy Punch
1/2" Circle Punch
3/4" Circle Punch
1 1/4" Scallop Circle Punch
Bitty Butterfly Punch 
Circle Framelits
Starburst Framelits

I had a little piece leftover so I grabbed some of my scraps and made this little thank you treat bag!  The banner is made from my masked and sprayed piece of paper.

I thought they made a cute little set!

I had so much fun with that one that I sprayed again!  This time I used Mossy Meadow as my ink color and I used the polka dot mask.

Made a cute little tag using the Yippee-Skippee stamp set.

This would be perfect on a card!

Book mark using the Work of Art stamp set.

Made a little flower embellishment with the left over scrap!  Cute, cute, cute!

Here they are together!  

You should really try these out!  Lots of fun! 
**************************************************************

I am putting together a team of demonstrators!!  If you would like to become a demonstrator and get a big ole' discount on your supplies, make some extra money, or start a fun business venture of your own I would love to have you join my team!  If you would like more info you can click HERE or send me an email and I will be happy to talk with you! 

I hope that you have a great day!   I will be back soonest with lots more to share!


Sunday, July 27, 2014

Christmas in July!

Well hello there!  Do you hear those sleigh bells ring-a-ling?! Ting-ting-ting-a-ling toooo?!  We had such a merry time last night at our monthly club meeting!  Our theme was....Christmas in July!  One of my sweet, fun club girls even wore her Christmas shirt and earrings!! Good stuff! :)  Would you like to see some pictures from our evening?!


I made some fun food for the festive event!  These are jello treats!  They are cherry, lime and raspberry!  We topped them with mounds of cool whip, but I was too busy eating mine and forgot to click a pic! LOL


I thought they looked mighty festive against their bright red backdrop!

Our veggie tree with hummus for dipping!  We also had rice crispie treats and pretzels and delicious cinnamon sugar cookies that my wonderful DIL baked!!  (She is a fantastic baker!!)


Here is the table all dressed and ready to go!

I made everyone a fun little purse gift to say thank you for coming! 
 (Idea courtesy of the very talented Becky Roberts.)

Here are the projects we made at the party:
This card uses packing tape for that fun sparkle!  We put packing tape sticky side up and covered it with Dazzling Diamonds!  Absolutely love this technique!  :)
(Idea found on Pinterest!)

The ornament is being suspended with our beautiful silver trim ribbon.


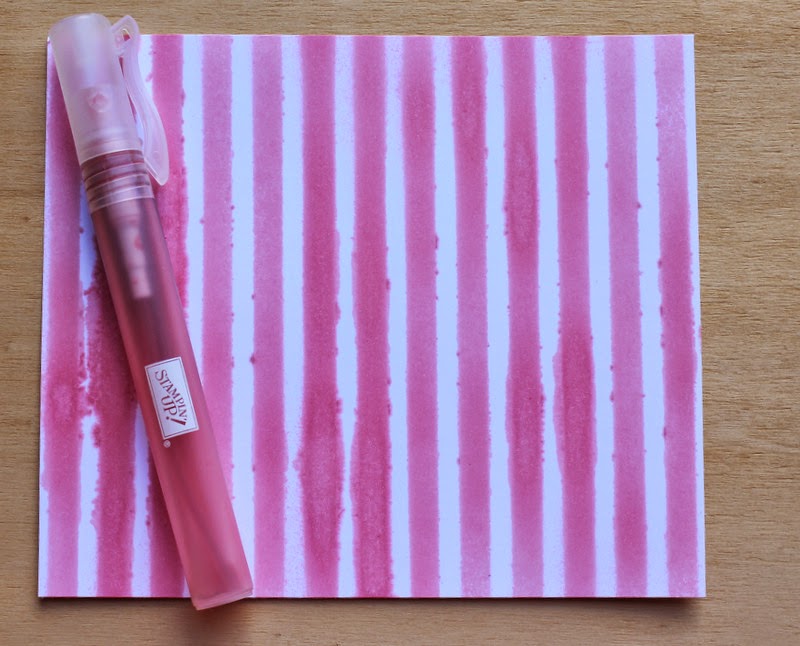
Second card we made uses Post-It notes to mask off a portion of the card and then we sponged, sponged, sponged!  Sentiment is from Teeny Tiny Wishes (and the award goes to TTW for the most versatile stamp set EVER!!).  

Flourish is from Everything Eleanor and the shimmer-y stars were punched from the Gold Glimmer paper.


Then we made a tag!  We used the Kinda Eclectic stamp set and the Petite Petals punch to make the wreath.

We added the tag topper to the top using the Scallop Tag Topper punch! 

Finally we made some ornaments.
                                              

We used the Mixed Bunch stamp set and the coordinating punch.

Silver glimmer paper for the dangle-y down bits and silver trim ribbon for the hanger.

I also picked up a styrofoam tree and made this cute little guy as a table centerpiece.  

I love Christmas in July!!  It was a blast spending it with such a great group of ladies too! 
*************************************************

I do have another cute thing to share with you today!


Our beautiful grand pumpkin is 9 months old already!  She finally grew a couple of teeth!  She just lights up my whole day! :)

Ok, well I am off to do some organizing and enjoy the rest of the weekend!  Hope that you enjoy yours too! I will be back soonest with more to share! 


Thursday, July 24, 2014

Convention Make n' takes!

Well hey there!  How are you today?!  Doing well, I hope!  I sat down last night to go through some of the oodles and oodles of things that I brought back from my trip (still  haven't had time to even look at all of my swaps yet!).  I dug out the make n' takes that we got from Convention and decided to sit and play with those.  There was just so much going on this year that I did not have time to put them together at Convention!  They were all such fun little projects though!  Want to see?

The first one was a Project Life page.  This is the smaller of the two sizes.  It is 6 x 8 and would make the cutest little album ever!  I am so excited to get my memory keeping back on track with our new Project Life supplies!  I made this page of our sweet puppy, Zoe.  I miss her so much!  The  whole thing went together in just a few minutes and will bring a smile to my face every time I look at it!  If you have any questions about Project Life zip me an email and I will get you all informed and ready to start your own memory keeping!

The second one was a card using the BEAUTIFUL new Kinda Eclectic stamp set!  When the annual catalog first came out and we found out we would be getting this set at Convention I had to sit on my hands to keep from buying it!!  It is such a fantastic set and has so many uses!! Love, love it! This uses almost all of the new In Colors. The more I play with them the deeper in love I fall! Gorgeous, rich colors make my heart flutter!


From another angle.

I decorated the envelope to match the card.  NO envelope should ever go naked!

It was a hard decision, but I think this one might be my favorite!  I really, really like these little journals!  They are the perfect size to tuck into your purse or bag.  They are a breeze to beautify all up and who doesn't need paper, right?!  You can buy them 2 for $4.95 and they would make great little gifts!  

I used the same stamp set to jazz this one up. I added a Baker's Twine bow around the butterfly belly for a different look and added some sparkle.  

The butterfly is three layers.  Two card stock and one in vellum. Pretty, fun, quick little project!  

Ok, well I hope you enjoyed my Make n' Takes as much as I enjoyed them! LOL  If you have any questions please e mail me!  I would love to chat with you! If you would like to add any of these fun things to your collection feel free to go shopping in my online store.  Just click HERE. If you have decided that you just cannot stand not being a Stampin' Up! demonstrator any longer click HERE and you can join my team!

I hope that you have a great day!  I will be back soonest with more to share!


Wednesday, July 23, 2014

My Paper Pumpkin...Oh my!!

Hellooooo!  Have you gotten your My Paper Pumpkin kit yet this month?!!  Oh my goodness!!  I think this one might be the very best one yet!!  I have also seen a sneaky peek of next months and it is even cuter!!  The folks over at the Paper Pumpkin place sure have stepped up their game!!  The kits are full, full, full of fun stuff now!  Want to see some details from this month's kit?!

Here it all is out of it's cute bright orange box!

A better view of the goodies!

Here they are all unpackaged!!!  So much stuff!!  We got enough stuff to make 6 cards with envelopes AND six  adorable boxes!!!  It comes with tags, tons of  "WISH"stickers, tons of silver stars, tons of blue sticker stars and hearts, a 10 piece stamp set (!!!), Baker's Twine, an entire spool of ribbon and a Stamping Spot!!  They really out did themselves this time!!

Here is one of the cute boxes all dolled up!  I made the tag using some of the accessories!

Side view!  Love, love, love that Blackberry Bliss!  Did I mention you get 6 of these boxes?!  All cut and pre-scored!!

Here is a close up of the tag I put together. The For You sentiment and the little heart are two of the stamps in the kit!

Here is a card I made using accessories from the kit! You get enough supplies to make 6 of these also! The cute little word Big is another of the stamps in the set.

Side view.

Here they are together! This would make a great little gift ensemble!

Here is an extra card I made using some of the goodies from the kit and some of the goodies I already own!  It is always a fun challenge to think outside of the Paper Pumpkin box and do your own thing using the things in the kit on other projects.

Side view.

Here are all 3 together.

If you are not a current subscriber and are interested now is an awesome time to subscribe!  Stampin' Up! is running a special! Take a look:

There’s no doubt you’ve heard of Paper Pumpkin. Have you given it a try? Now is the time! Get 50% off* your first two months when you sign up by September 10. Just click HERE and use promo code: HALFOFF2. 

After your first two months, keep the creativity coming for just $19.95 US/$24.95 CAN + tax per month (shipping included). Each month a fully designed project kit will arrive at your door with stamps, ink, and paper—everything cut and ready to go.

It’s commitment-free! You can cancel or suspend your membership at any time—really! So, go on, give it a try. What do you have to lose? (Except some boredom.)

*For new subscribers only, not valid on prepaid subscriptions. Discount applied to one kit per month for the first two months of a new subscription.
*************************************************************

So, what are you waiting for?!  Hop on over to the link above (that says click here!) and get yourself all signed up! 

Ok, I am still in the middle of laundry and unpacking so I must scoot!  I will be back soonest with lots more to share!  Have a wonderful day!