Independent Stampin Up! Demonstrator since 2007
Welcome to my little ole' stamping blog! I'm so glad that you stopped by! I have lots of creative things to share with you with the occasional life post thrown in! Come on in, relax and stay awhile! :)

Monday, February 24, 2014

Paper Pumpkin Love!!!

Hello!!  Happy Monday to you!  I have been running around all over the place today checking things off my To Do list!  Yay!  I just love productivity!! One of the things I did today was to open this month's My Paper Pumpkin and play!  It has been sitting on my table for several days unopened and calling to me!!  I must say that I think this month's kit may be my very favorite of all time PP kit!!!!  It is a package of 5 (!!!) plain gift bags just waiting to be dressed up and dolled up!  The kit comes with all of this fun stuff:

Let me open it and show you all the goodies:

You get 5 bags, the adorable stamps (have I mentioned I have a thing for polka dots {{Scoooooore!!}}), a Stampin' Spot, all kinds of embellishments, and ribbon for your bag handles!

Close up of the stamps and spot.  Honestly, just between you and I, I am not crazy about the clear stamps.  They are stinky, but I do LOOOOOVE these patterns so I will plug my nose and stamp happily with these lil' cuties!! 

Ok, here is one of the bags I dressed up!  I used lots of goodies from the kit, but also added a few of my own.  The gift bag is made from sturdy thick paper and comes in that beautiful Baked Brown Sugar color.  *swooons!*   It is a good size to hold some nice goodies!

Here it is laying flat.  Before stamping I randomly blotted off the inked stamp because I wanted to give the images a worn look.  I really like the way they came out.

Here is a close up of the embellishment that I added to the bag once I finished my stamping.  

No gift is complete without a little card and what better than a card that matches?!!  I carried the theme through by using he stamps and the same colors. The card measures 4 1/4" x 4 1/4".

Here they are together!  I cannot wait to dress up the rest of these bags!  I have lots of ideas running through my head!

I am finding that I am really enjoying the Paper Pumpkin kits!  They are perfect for a quick craft and have really been a lot of fun!  If you would like to receive My Paper Pumpkin too it is easy as can be to sign up!  Click this picture for more information!

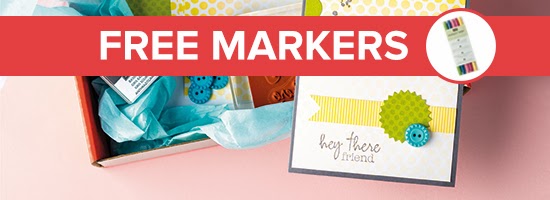
Oh!  Guess I forgot to mention that if you sign up before March 31st you also receive a package of free markers! :)

Ok, I better get back to my To Do list!  I will be back soonest with more to share!  Have a wonderful day!


Saturday, February 22, 2014

Toilet paper roll mini album!

Hello there!  OMGoodness is it ever pretty outside today!!!!  The sun is shinning and the bids are singing and there is no snow coming out of the sky and I am pretty darn happy about that! :)  I spent a little bit of time working on a fun mini album this morning.  It is not finished, but just between you and I (shhhhh!) I really want to go out and play so I will show you what I got done today! LOL

This is made from 4 toilet paper tubes!  They are squished flat and all dressed up!  It is held together on the ends with ribbon.

The cool thing about the flattened tubes is that you have an instant pocket for tags!  Adding tags gives you more room for pictures, memorabilia and journaling. 

Here is the first page spread.  I haven't added mattes or any embellishments yet.

Second page spread!

Third page spread!

Here are the pages together.  Once I get pictures and embellishments and other goodies in there it will chunk right up, so I thought 4 pages would be the perfect amount!  You could use as many tubes as you would like though! 

Here is a close up of the cover so far.  I will probably go back and add some more goodies to it once the album part is done! 

For the tags I used the fun new tag punch in the Occasions mini!  I cut 2" strips of Whisper White card stock and punched them on both ends with the new punch.  Then I folded them in half and they fit perfectly into the tubes!  

I left two of them attached at the end so that they open book style.

I cut two of them in half to create separate tags and tucked each set into a tube!

Here is the whole mini again!  These little guys are just so much fun to make!!  Plus I recycled!! Go me!!! :)  I would highly recommend making one of these for yourself!!  They are really easy and you can tuck it into your bag or purse so show off some of the people you hold so dear!!  If you have any questions please feel free to shoot me an email! 

OK, I am off to head outside and soak up some of this beautiful day!!  Have a happy Saturday everyone!


Friday, February 21, 2014

Sending good thoughts!

Hello there!  I have been working on kind of a time intensive, but oh so fun project that I am really anxious to share with you guys!!  Hopefully I will be wrapping it up soon and promise to share it then, but today I have a card to share with you!  I got some fun new toys that I finally pulled out this morning and did a little bit of playing with! Here is a card I made:

Lots of stuff going on here!  I wanted so add lots of texture, but didn't want it to be too busy.  I embossed  with polka dots and with stripes and if you look very closely you may be able to see the polka dots I stamped on the card base!

I added some Bitty butterflies and gave them Baker's Twine bodies and antennae. I punched out three butterflies and three flowers for continuity.  The sentiment and matted border are from the Perfect Banners stamp set and  coordinating Framelits.

Here is a close up of the flowers.  I stamped the new awesome Hardwood background stamp and punched out these flowers from the stamped image.  It gave a really interesting look to the flowers!  You can also see the stamped polka dots here!  I LOVE polka dots!!  Once I assembled the flowers I ran them  through the Polka dotted EF.  

I have about three projects going on at once today, so I am off!  Hope you have a great day!  I will be back soonest with more to share! :)


Wednesday, February 19, 2014

You make me smile!

Hi! Happy middle of the week!  Weather promises to be absolutely beautiful today and I cannot tell a lie...I am so happy about that I could twirl in circles!!!  It has been a loooong winter and although I don't think we are actually done with it, there appears to be some warmth and sunshine headed this way over the next couple of days!!  I will take it! :) I have another card to share with you today!  I saw a similar technique done recently and decided to add my own spin to it!  Here is the card I made:

I stamped one flower and then used the masking technique to stamp a second one and add the leaves. I drew the frame using framelits as my guide.  I added shadows  with a blender pen and Smoky Slate ink pad and the sentiment is it's own separate stamped, matted and adhered piece!!

I used the Hello there stamp from Timeless Talk and matted it against a scallop circle punch on Basic Black to pull in the color from above.  I added dots with my white gel pen to the circle and the frame.  Finished it off by adding Dazzling Details the the flower centers for some subtle sparkle.

This was really a fun card to make!  Took a little longer than usual, but totally worth it!!  The color combo is Primrose Petals, Rich Razzleberry, Melon Mambo,  Old Olive,  Whisper White and Basic Black.  I wouldn't usually pair MM with PP, but I liked the contrast it offered here so I went with it!!

Have you tried the masking technique?  Such a simple thing, but it adds so much to a project!!  Love it!

I hope that the sun shines on you today and that your day is warm and wonderful!!  I will be back soonest with more to share!


Tuesday, February 18, 2014

Couple of cards!

Hello there!  It is absolutely beautiful here today!  It makes me very hopeful that Spring is just around the corner! *fingers and toes crossed!*   It put me in a chipper mood which put me in a crafty mood so I sat down and made not one, but two cards!  Wooo hooooo!  Both cards were inspired by things I saw on Pinterest!  I just love it there! :)


This first card technique is called cascading flowers and I believe it came from Brandy of Brandyscards originally.

It is made on a simple Whisper White base and has lots of lovely layered flowers from the stamp set Flower Shop. 

They are layered three high in a couple of places and are punched with the coordinating posy punch.  I tucked in lots of leaves from the Bird Builder punch to break up the color some.  I added a simple sentiment from the Timeless Talk stamp set.  

The second card uses the really cool masking tape technique that I learned from my very talented and sweet friend Carolyn.  You rip off a piece of masking tape and lay it against your stamp pad and then apply it to your card base and gently peel it up.  I tried it with Washi tape and it worked perfectly!

I used the same stamp pads here that I used for the above flower card.  Funny how the colors can be the same, but the card can look so different!  


I punched out two Whisper White circles and stamped this classic bicycle form Timeless Talk onto both of them at the same time.  I matted them against Basic Black circles to make the image pop.  I added Dazzling Diamonds to the wheel swirls and then each one got a rhinestone. The sentiment is from Happy Watercolor and the whole thing is popped up on dimensionals.

I had fun with both of these cards!

Ok, I am going to head out and soak up some of that vitamin D while the day is still pretty!  Hope you have a great day!  I will be back soonest with more to share! :)

Friday, February 14, 2014

Happy Valentine's Day!!!

Happy, happy Valentine's Day to you!!   Are you feeling all pink, red and white?  I sure am and so I have a couple of  love filled cards to share with you today! I love Valentine's Day!!  Not just because it is a wonderful excuse to eat chocolate (not that I need one of those!), but because it is just fun to acknowledge some extra love today!  I love my peeps every single day of the year, but it is always nice to show a little bit of extra love! Here are a couple of the cards I have made:

Love comes in all sizes so this is a little bitty card! 
3 x 3 love! :)  

Here is another one!  See...pink, red and white!  I love it! 

This is a fun little fold!  You start with a 4 x 4 square and fold it in half once, open it and fold it in half the other way.  This allows you to mark the center.  Then you fold each corner into the center and then fold each  new corner back out!  Easy peasy and it gives you a fun little spot to add something!  You could add a flower or button or a stamped image or tea bag or chocolate or....

Close up of the fold!

I am off to shovel more snow!  There is a ton of it out there!  I hope that you have a day full of love!  I will be back soonest with more to share! 


Thursday, February 13, 2014

Well....it snowed!

Hey there!  Are you buried under the snow where you are today?!  We sure are!  At last measure it was 14" and it is still coming down now, but as sleet and snow!   Everything is covered!  It looks like the whole world has been whip creamed!  Normally I would enjoy a winter event like this (As long as it comes and goes quickly!), but my peeps are spread out all over the place and so it has been more nerve wracking than anything.  This is the biggest snow we have had in years!  Want to see?!

This is our deck!


This is the view from the front door!

That cute little orange speck is our car!!  

Side deck!

One of our puppy's who prefers to be outside than in! (although she is laying by the fire as I type this!) LOL

Front!

I used my favorite craft ruler to measure!  (Notice the adhesive all over it!) LOL

It is a perfect day to do some crafting I believe!  Think I will do a quick house pick up, bring in some more wood, get some soup on the stove and find something crafty to do!  Hope your day involves some craft happiness too!

Stay warm!!  Much love!