
I decided since there was not much I could do about the weather I would at least craft Spring-y! I saw the cutest little bunny guy here on Kim's awesome blog and was inspired to take out my new punch and try to make a similar one. Here is my version of this spring bunny in all of her cuteness:

What do you think?! I changed her up a bit! I used the new Stampin Up! Build-A-Flower punch for her ears (both layers) and her bunny belly. Her paws are 3/4" circles and her feet are cut from the Scallop Oval punch. (cut exactly in half and then in half again and rounded). Her head is a 1 3/8" Circle. I sponged all the pieces with Chocolate Chip and stamped her little face. Isn't she adorable?
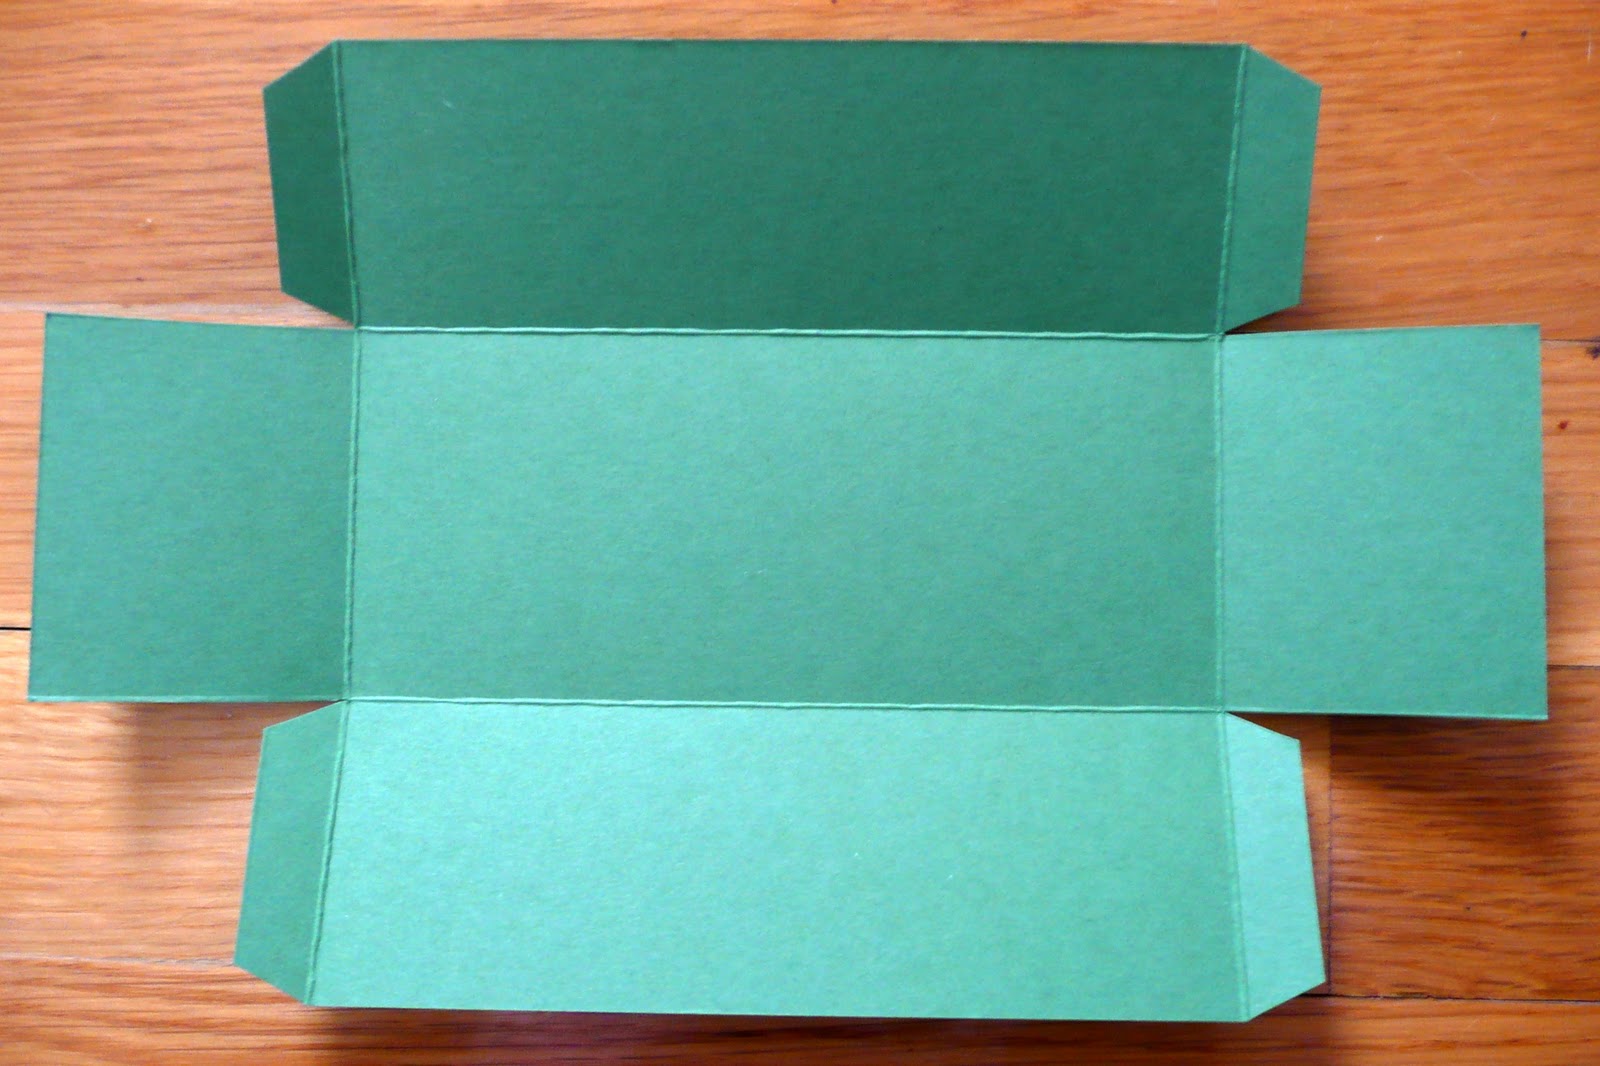
So then I needed to put her on something. I was going to put her on a card, but then decided she needed a basket to hang out on! I started with a 6 1/2" X 10" piece of Garden Green card stock and scored it on the 6 1/2" side at 2" and 4". The I turned it to the 10" side and scored it at 2" and 8". That created three panels. On the 10" side I scored at 1 1/2" and 8 1/2" BUT ONLY ON THE TWO OUTSIDE PANELS. Here is a picture to try to make that a little more clear:
I cut away the ends and cut in making two tabs so I cut assemble the box with these. Then I used the Dotted Border Punch to make trim for the basket top (and handle) and adhered it before I assembled the box. This is what it looked like before I assembled everything with the trim in place and the sticky strip ready to go:

Next I added a handle, some flower brads and the bunny! I added a flower to her ear and used pop dots to raise her up off of the basket. Here it is all finished:

And a side view:

The bunny in all of her cuteness:

She makes me smile! :)
I really enjoyed making this little basket! Can you guess what I am going to fill it with! Big, cheesy grin! I hope that you have a day filled with warmth and sunshine and very little snow! I will be back soonest with more to share!

Oh you make me want to get crafty for easter.
ReplyDelete