
I mentioned recently that I wanted to try out some new things this year with one of them being mini albums! I just LOVE them! They are so much fun to create and even more fun to embellish and fill full of wonderful memories! So, lucky me, my awesome demo group had a swap this past weekend and it was to create something using the new envelope punch board. Do you have one yet?!!! If not, you need one! These things are just too much fun!! Here is a direct link to where you can buy one for yourself -------> BUY ME HERE!! Seriously, go....I will wait! We could create anything we wanted as long as we used the envelope punch board to do it! Three guesses (and the first two do not count!) what I made?!! A mini album!!! Yep! Take a look:

This is made from 3 of the gift size envelopes! The outside edge is open creating pockets to hold tags (which in the mini album world means more room for cute little pictures and notes!!)

This is what the inside pages look like! Once I have added photos I will add more flowers and fun doo-dads!

Here it is with the tags in place! They are also made using the the envelope punch board!

Here they are all pulled out!

Totally out of the album. I left them blank so pictures and journaling can be added to both sides.
Want some instructions?

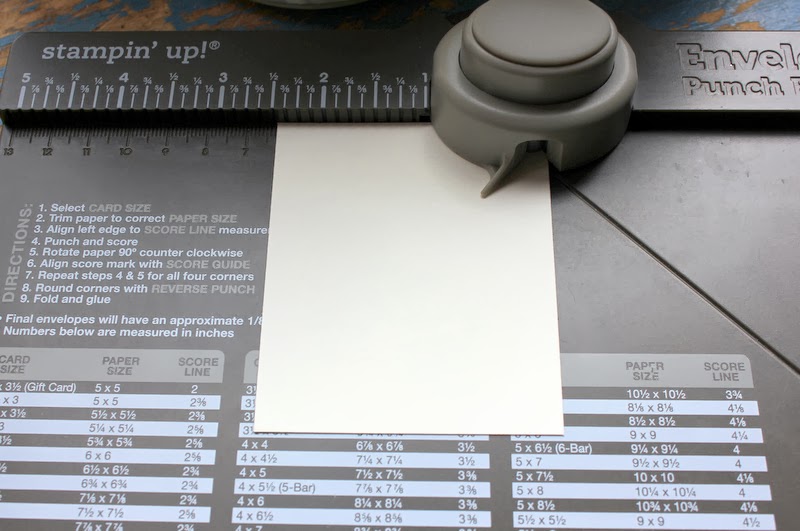
Ok, this is what I did! I made this by making 3 of the smallest (gift card size) envelopes. You cut a 5 x 5 square and line it up with the 2 3/8" score mark. Once you make the first punch and score line then you just rotate it around to each side and do the same thing using the pointy score line thingie (technical term!) as your new score line guide.
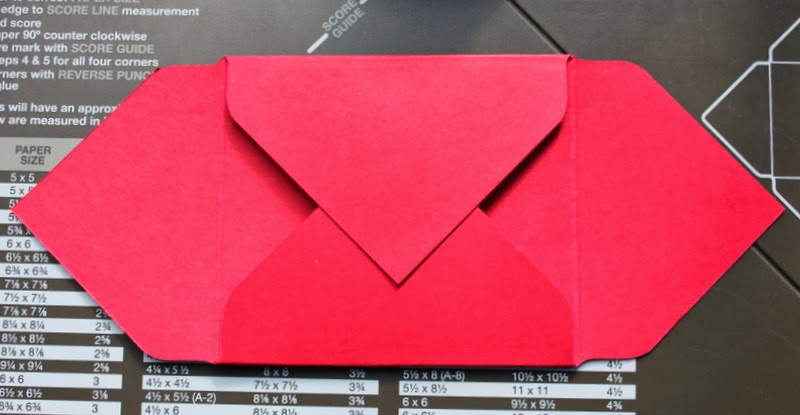
You fold in the long sides and glue them closed at the triangle parts.

Then you cut one triangle on the short side completely off at the score line.

Then you cut the other side off about 1/2" from the score line leaving a tab. This tab will act as your album spine. You will want to make as many of these as you want to have pages for in your album. I made three for this particular album, but you could easily do 6-7. Keep in mind the more pages you create the more open your book will splay. Now, in my opinion, the chunkier and thicker an album is the more interesting and fun it is!! Now stack them on top of one another and staple them together in the center of that spine. I punched a hole on either side of the staple and then added a ribbon to hide it. Add a square of card stock to cover the triangle pieces and create a solid page to add your pictures to.
Now on to the tabs!
You will use the same punch part of the board to shape your edges. Insert the card stock so that it lines up like this.

Closer view! Now punch!

It should look like this. Now flip it completely over so the punched side is now on the left and punch again to get the same shape on the other side. There you go! Now you have tags! Make one for each page. There you have it....a mini album!

The details:
Stamps: Perfect Pennants and Petite Petals
Ink: Smoky Slate, Marina Mist and Midnight Muse
Paper: Marina Mist, Midnight Muse, Basic Gray, Very Vanilla and Silver Glimmer
Punches and Dies: Petite Petals punch, hole punch
Extras: Silver Ribbon, Rhinestones, Dimensionals and Envelope Punch Board
Thank you so much for bearing with me during my absence! I am really excited to be back! I will be back soonest with more to share!
Have a wonderful day!

This project is so cute!
ReplyDeleteLove it! And the tutorial is great. I can't wait to try it.
ReplyDeleteBrilliant project AM!
ReplyDeleteAwesome! So glad you are getting your mini albums made!! Lovin' the blue!!!
ReplyDelete