

This is the teeniest tiniest envelope that it makes! I should have put something in the picture to show scale, but since I didn't think about that little bitty note card that comes with a flower delivery. It is that size! After I cut it down to size and did all of my measuring, scoring and punching I ran the whole thing through an EF and then added the embellishments. It is very pretty in person!

Here is that tiny little guy on top of the biggest size it will make! This giant one is made from an 11" x 11" piece of paper! It will hold a lot of card! LOL
These next two are gift card size and they are made from DSP. The top picture is of them closed and...

here they are with one flap open. Double sided paper makes for very pretty envelopes!

Here is a 3" x 3" card with a matching envelope! It looks so finished and professional when they match!

Here are a couple more sizes! One is just plain ole' card stock and the other is made from DSP again!

Since it makes over 60 different sized envelopes you can make them to fit your square cards too!

This one is for a 5" x 5" card. It is all dressed up and wearing a bow tie!
After everyone took a couple of turns making a couple of different sizes of envelopes we moved on to liners!! See....

It really fancies up a plain envelope to line the inside and it is sooooo easy to do!
Next we moved on to tags!!! Here are the three sizes I made to show everyone:

You just use the punch to notch out the sides and then the other side of the punch to round the corners! These little guys have a ton of possibilities! I will never give a plain gift again! LOL
Next came this fun little treat holder! It is a regular envelope scored twice on two sides and then folded over on two sides only and fastened in place. I added a little banner and a ribbon and a puffy flower made from punches! these would make cute party favors or little gifts to hand out at Christmas time! I saw a similar idea on Pinterest, but it didn't link back to the original designer. If it is your design please let me know so I can give you credit!

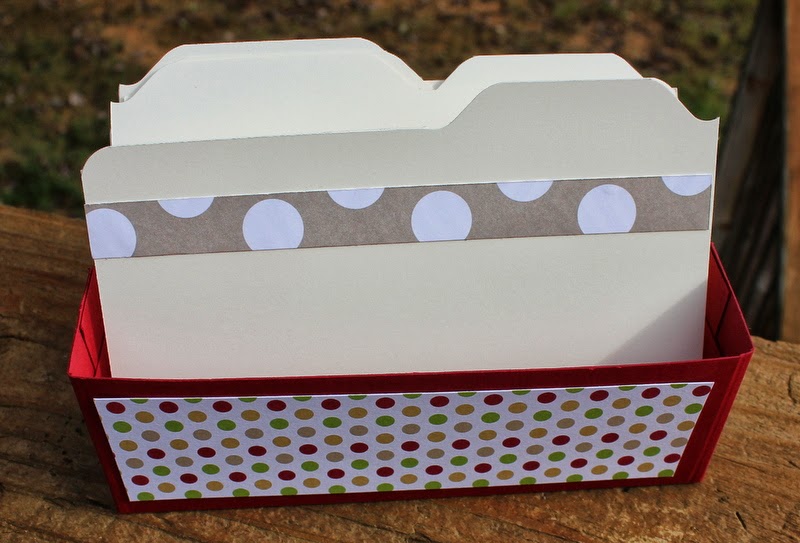
This one is so exciting I can barely contain myself!! This idea came from the very talented Patty Bennett! It is a little bitty file folder made from...you guessed it...the Envelope Punch Board!

I made several more and added some DSP to dress them up.

Then I tucked them all into this little card box!
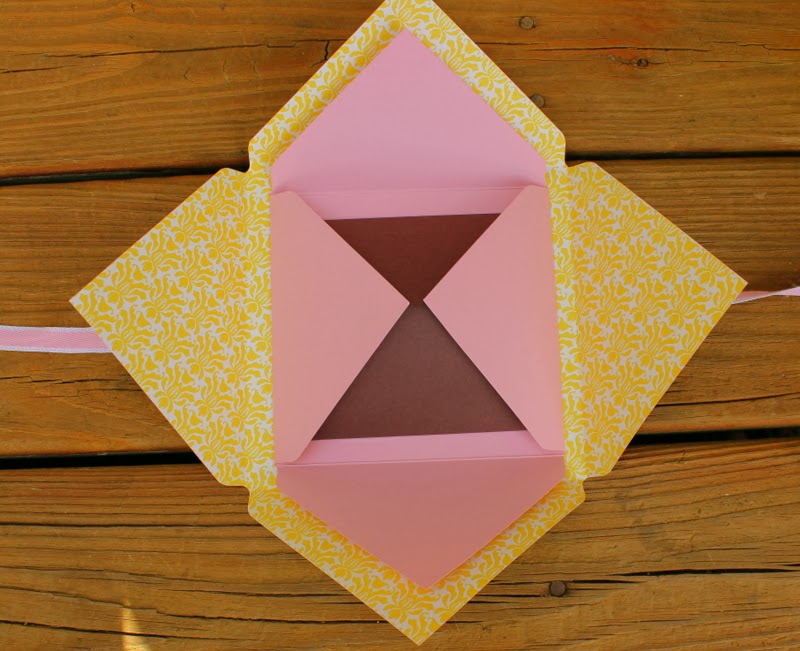
Then I dressed one up and turned it into a card.


The center pulls out for a sentiment!

Next came this little mini album!! I am very excited about this one!! You will notice that it is naked!! I haven't added anything to it yet, because it is going to be a brag book for my first grandbaby...who is due in two weeks!!!!!! Eeeeeeek!!! :)

I made and attached four envelopes together by adhering the flap to the back of the one next to it!

Then I covered each side with a piece of card stock. The open part of the envelope holds a tag that I will be able to add pictures and journaling to once she arrives and we get to see her beautiful self!!

It stands up too!
Next is another idea I saw online. It is a variation on an explosion box!! It is also naked. I only made the bare bones skeleton to show my girls how to make one.

The outside is a piece of DSP and it opens up like this:
and this...

and this....

and finally like this! This would be so cute with pictures and little embellishments and could open up to reveal a gift card or money or an engagement ring!!
Here is another envelope that I dressed up some:

and the inside!

Finally we made a box!! It holds cards and matching envelopes!!!

It is held together by a belly band!

Band off...

Box open!

Matching cards and envelopes! All made from the fancy schmancy envelope punch board.
We had so much fun!! If you haven't gotten one of these yet I highly recommend it!! You can pick one up right here in my online store!
This is what is looks like:

and here is a link to how it works:
I hope some of these ideas have inspired you! Have a wonderful day and happy envelope making to you!

WOW!!! This is an amazing post... love all your items! I'm wanting to know how to make the little folder with the envelope punch... gonna have to do some research. ;)
ReplyDeleteWhat a fabulous class! I am in awe of all of the amazing things you created!!
ReplyDelete