
Hey there! Are you a fan of the mini album?! I love, love, love mini albums!! On that happy note, I have another mini album to share with you guys today! It uses minimal supplies, but has oodles of space to add goodies to! I am going to get right to it today, because this is going to be a long post!! Now might be a good time to grab a fresh drink or make a banana split!! I'll wait, but be quick...!!
Ok, here is my mini album:

This album measures 4 1/4" x 5 1/2". I used Pear Pizzazz to make my base and covered the whole thing using the beautiful Whole Lot of Lovely DSP pack! That stuff is gorgeous!!

I kept my cover very simple since the paper is so bold. I stamped my sentiment using the Waterfront stamp set onto Whisper White and then cut it out using the Stitched Framelits set and layered it onto a scalloped square from the Layering Squares Framelits. I used Calypso Coral for that. I fussy cut one of the flowers from the paper and glued it on top. I popped the whole thing up using Dimensionals.

This is the back cover!

This is what it looks like as it begins to unfold!! I haven't added anything to the inside yet, because I wanted to get it posted for you guys! It is going to get stuffed with pictures and fun embellishments though!!
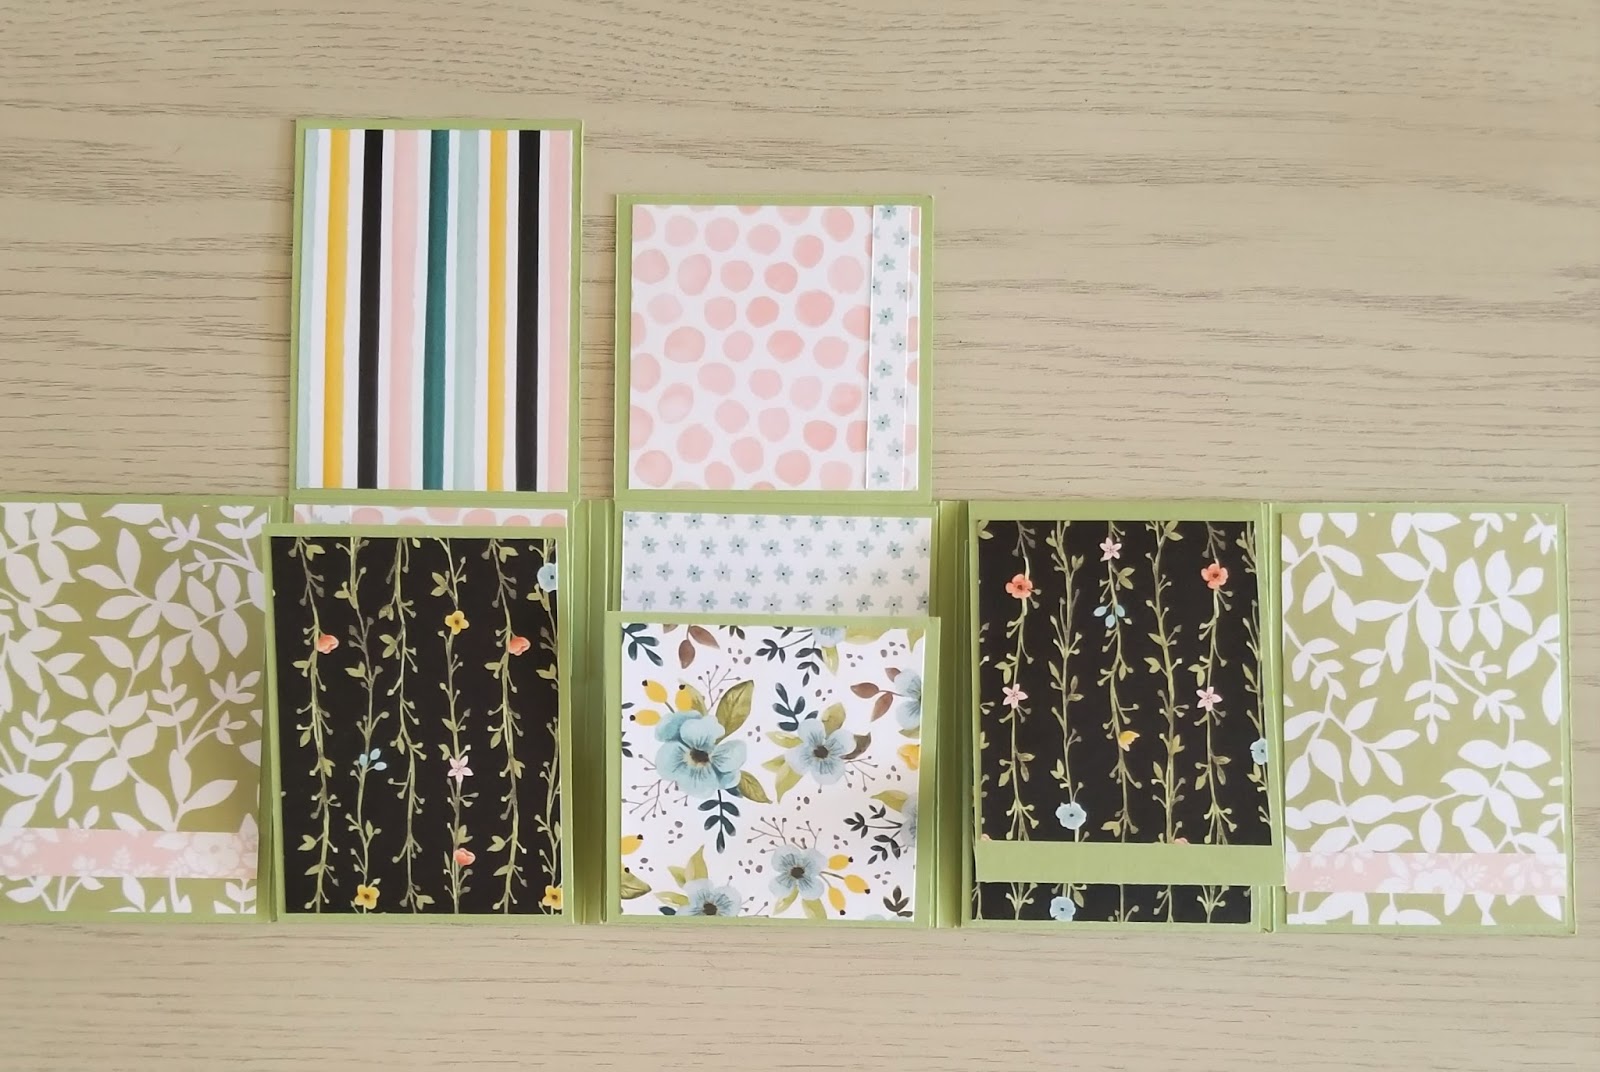
More unfolding!!!

More unfolding!!! Look at all of that space!! This is what the front/inside looks like!

This is the back side, but every space you see will hold a picture or quote or love note or...
Ok, would you like to make one too?!! I put together a tutorial for the body of the album!! It is very simple and goes together quickly once you get everything cut, scored and sticky taped!! Let's get started:
You are going to need:
(Color of your choice...this will be your album base and will be visible!)
(2) 5 1/2" x 8 1/2" pieces of card stock (center)
(2) 4 1/4" x 5 1/2" piece of card stock (far ends)
(4) 3 3/4" x 5 1/2" (top and bottom side flaps)
(2) 4 1/8" x 4 1/2" (top and bottom center flaps)
(2) 3 3/4" x 5 7/8" (decorative panel sides)
(1) 4 3/8" x 5 7/8" (decorative panel center)

Find your 5 1/2" x 8 1/2" pieces.

Score both of them at 4 1/4" and 4 1/2". Using a bone folder fold and crease on your score lines creating a book cover looking shape.

Next find your 4 1/4" x 5 1/2" pieces.

Score, fold and crease both pieces 1/2" from the one end.

Find your 3 3/4" x 5 1/2" pieces.

Repeating process score all four 1/2" from one end.

Find your 4 1/8" x 4 1/2" pieces.

Score, crease and fold 1/2" from the end (on the 4 1/2" side).

Cut a diagonal corner off of every piece that you just scored the 1/2" on. This will help to cut down on bulk when decorating and folding the album up.

They should look like this now!

Using Tear and stick tape add 2 strips to each end past the score mark and set aside.

Find your large pieces again and add tear and stick tape the 4 1/4" side of one of them as pictured. Measure this, because one side is slightly shorter!!! If you want to only add it on three sides this will leave an opening for a tag later! If not then you can add tape to all 4 sides.

Once you have done that measure your other piece and lay the 4 1/4" side on top of the first one. The short ends (4") should be the outside panels!!

Time to start assembling the album base. Find your 4 1/8" x 4 1/2" pieces and adhere them to your centers as pictured.

Next repeating that process add your 3 3/4" 5 1/2" pieces to the ends.

Now add your 4 1/4" x 5 1/2" pieces to the ends. It should look like this!

Find your last three pieces (the decorative pieces!).

The largest one goes in the center and I glued the whole thing down and added some DSP on top! This hides all of your seams and cleans things up a bit! I only glued three sides of the side pieces down though so I would have 2 pockets that I can tuck more photos or a tag into later!

After I added my DSP I used my 1" circle punch and punched out half a circle. This will help to get the pocket contents in and out easier.

Then I added DSP to all of the panels! I simply subtracted 1/4" from the top and side to get my measurements for these.

I did the same for the back side!

Here it the completed album again!
If you make one please leave me a comment!! I would love to see yours!
Here are all of the goodies that I used to create this album:
Product List


I am off to squeeze in a workout before the sun goes down and it just doesn't happen! I hope that you have a wonderful day and that you find some time today to be creative!
Be sure to stop back by tomorrow I have lots more to share!

No comments:
Post a Comment